9 Key Build Guide
 9Key Firmware Files (QMK / KBFirmware.com / HEX)
First things first grab the 9Key Files and a copy of AVRDudess or your favorite keyboard firmware flashing program compatible with QMK/TMK firmware HEX files.
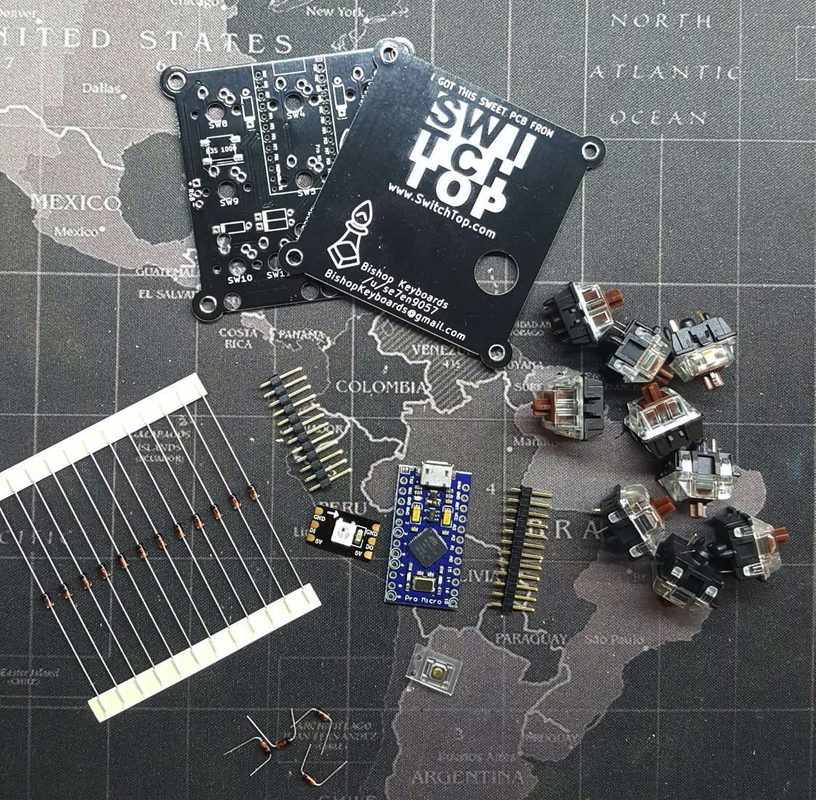
Gather Materials…. a basic bill of materials will be on the back of the pcb its self.
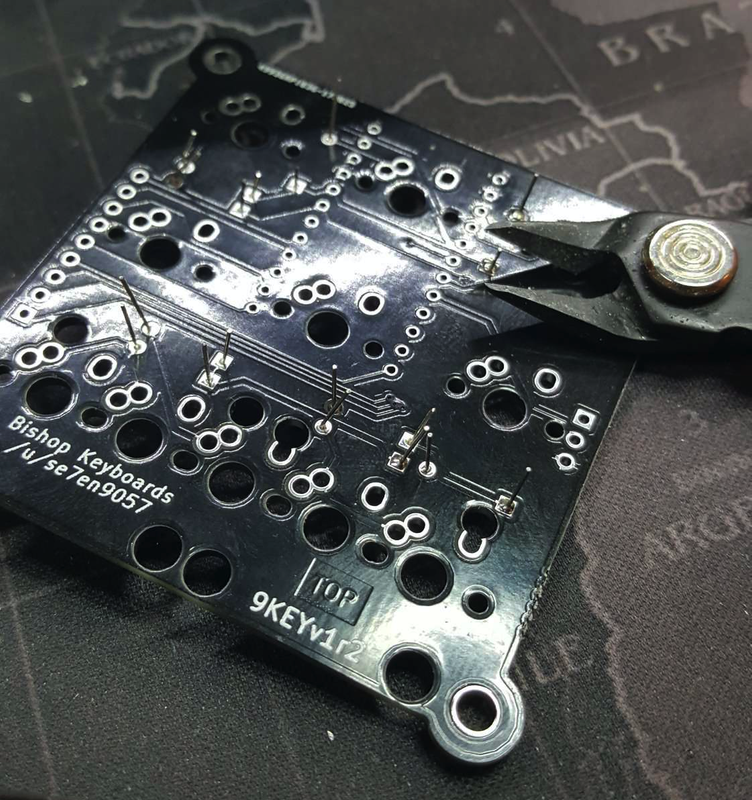
 Bend and snap the two parts of the PCB apart along the break lines. You may need pliers or snips to help in this step. The PCB material may be sharp.

Next begin by soldering the Diodes and reset switch(optional)
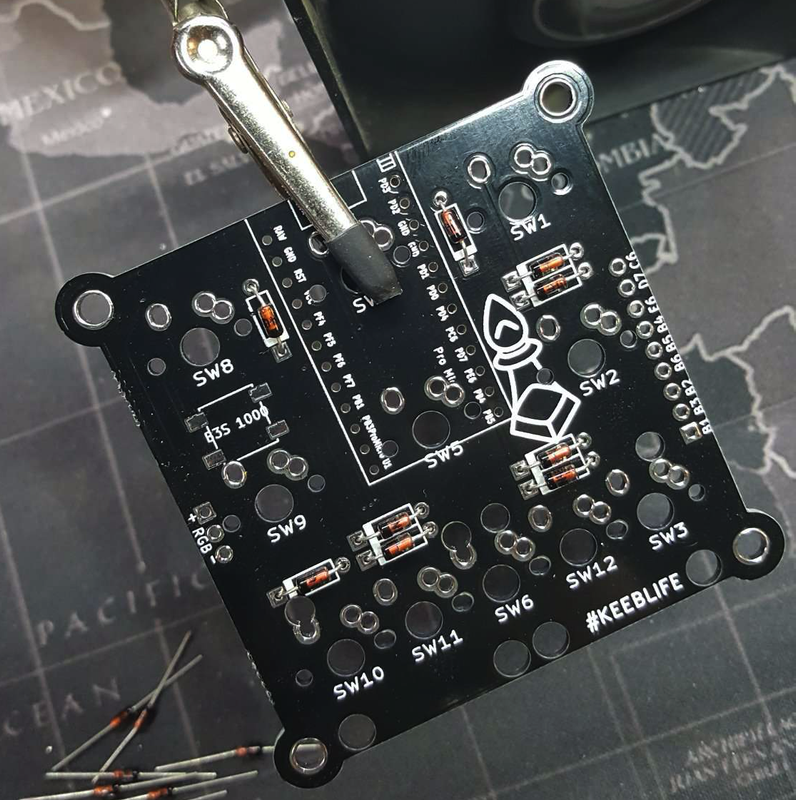
Note the diode black stripe. Diodes have to be installed in a certain direction. black strip towards the thicker bar on the silk screen/square hole.
clip the tails off the diodes you just soldered in. Use eye protection when clipping these!
Next solder in the Pro Micro headers.
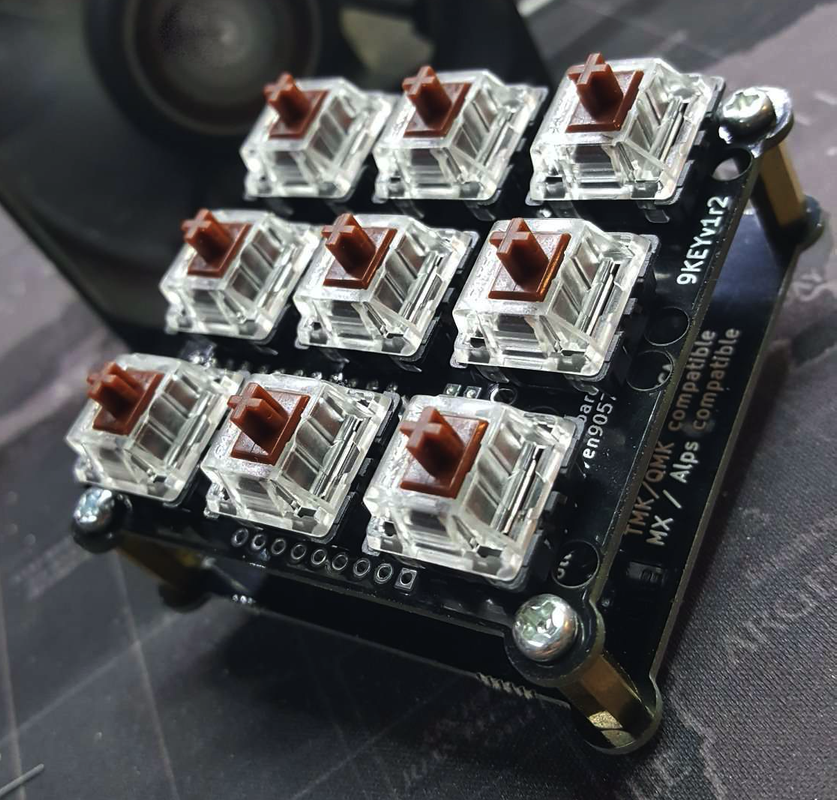
Solder in the switches next. You can use the alternative inverted switch holes on the bottom row to insert a 2 u key on the left or right side. pcb mount stabilizers should be installed during this step if desired.
final required step! the controller… Pro Micro
the pro micro orientation is marked with a square shown in the picture below.
Soldering in an RGB LED is optional. you will require a minimum of one WS2812b led circuit.
there are three headers marked + RGB –
ensure the + / vcc pin goes to the +/vcc on the ws2812b circuit and the – / GND pin goes to the -/GND pin on the WS2812b circuit.
The RGB pin is the data pin and must go to the data in put on the WS2812b (usually middle pin)
Note: WS2812b led circuit strips are directional. look for an arrow. data flows with the arrow.
Now you need a minimum of a 7mm standoff that accepts a M3 sized screw.
Make sure you line up the hole for the reset switch you soldered in a previous step.
At this step your keyboard assembly is complete just add keycaps!
Firmware time!
I use AVR Dudess to program my pro-micro’s but may other programs are out there that work just as well.
this image will show the required settings.
you will likely have to press the reset button for the proper USB port to show up. you will only have afew seconds to press the reset button and then press Program!
ensure you have all the settings selected prior to doing this step. and have your hex file location.
included in the 9key programing files bundle is the JSON file for easy programming in KBFirmware.com all the pin headers are pre-configured. simply customize your key map and indicate the number of ws2812b led’s and get HEX.
Hestia | Developed by ThemeIsle